

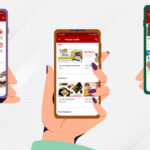
A Guide For Employees Subscribing to the RANGGO App
First find the RANGGO App on the App Store or Play Store
Before downloading the App, go to the three dots in the top right and select ‘Automatic Updates’. This will ensure your App updates any new features and functions automatically.
Now download the RANGGO App to your phone or tablet.
- When the download completes click “Open”. If a friend or colleague who has the App you can add their referral code at the start of the sign up. They will earn points in the App. You can also get points if you refer people to the App.
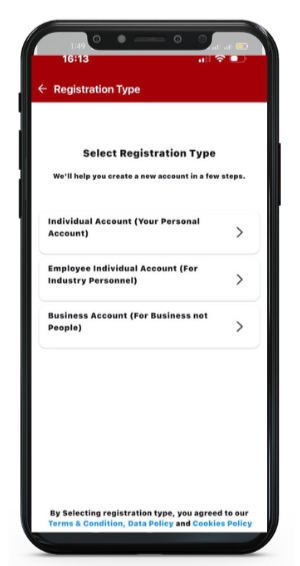
- On the “Select Registration Type” screen, select Individual Account (Your Personal Account) – this is the quickest way to join the App. You can upgrade to a free Premium Employee account once you have completed this registration or later when you have time.
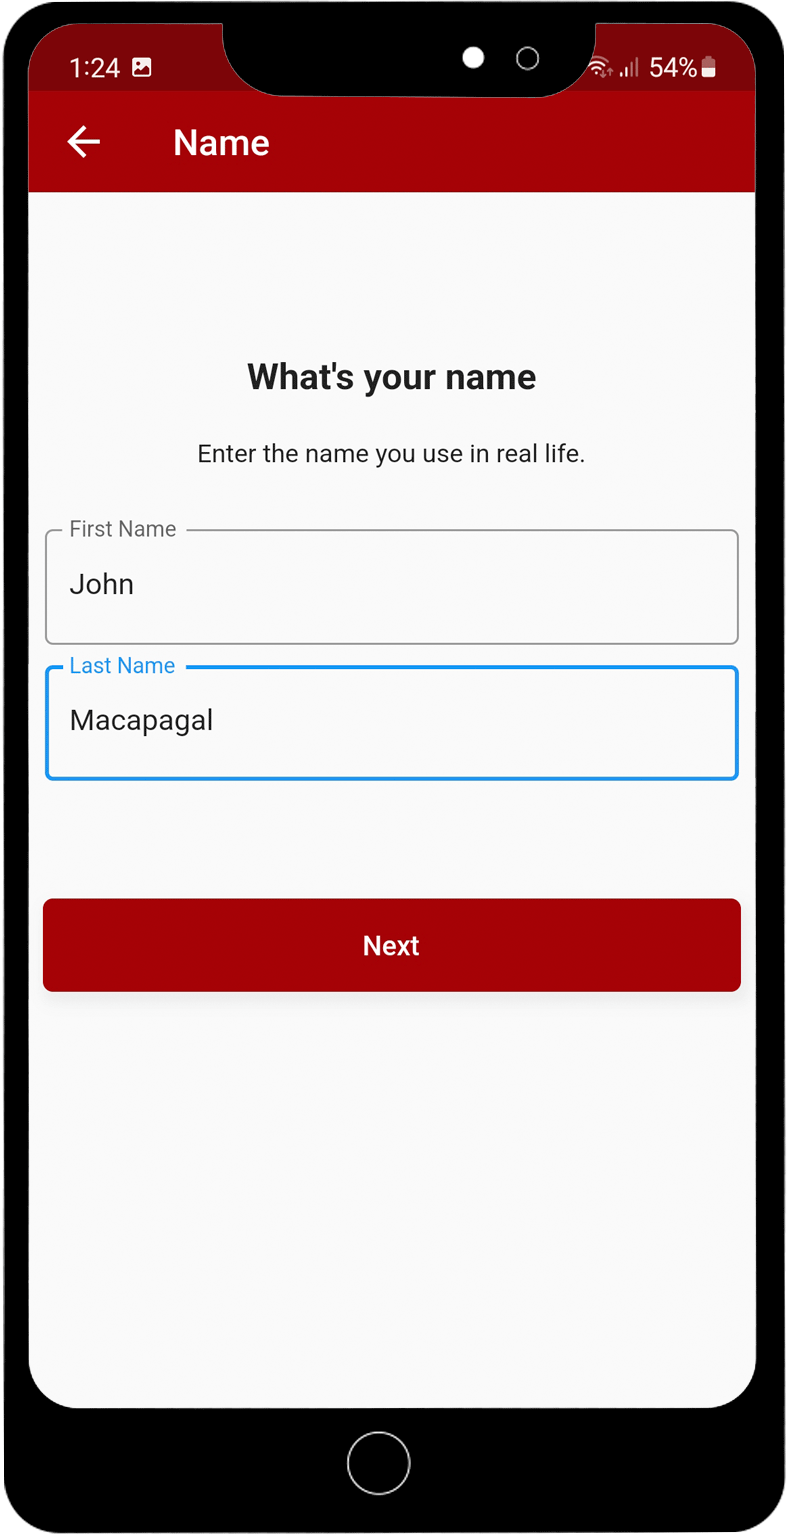
3. Enter your correct name; First Name and Surname/Family Name.
It is important that you subscribe using your actual name.
WHY? When you upgrade to the Premium Employee account you will be able to link your profile to the company/business you work for (like LinkedIn).
AND, your profile will be convertible into a resume, which you can send to Businesses advertising jobs on the RANGGO App.
Also, the App will be used by customers who want leave a review and rank for you and the service you provided to them.
So you don’t want your employers, future employers or customers/guests to see a silly name!
4. Next Add Your Email Address, Then choose a Password and click Next. The final screen asks you to Save the information.
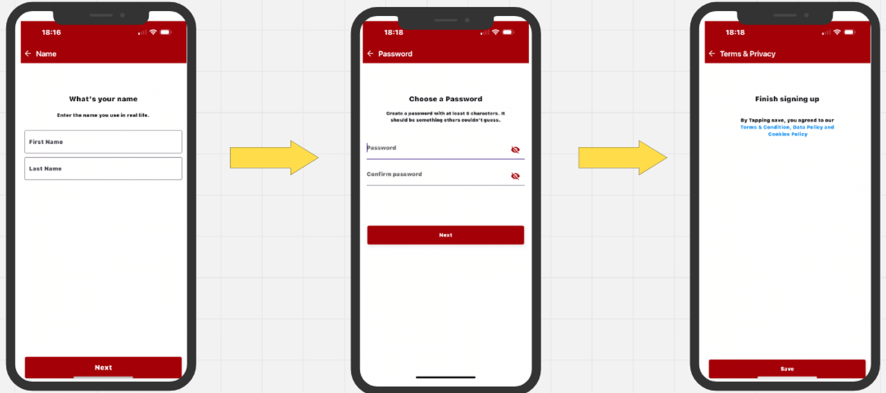
Congratulations you have created your account!
Employees Subscribing to the RANGGO App: Completing Your Profile in Full
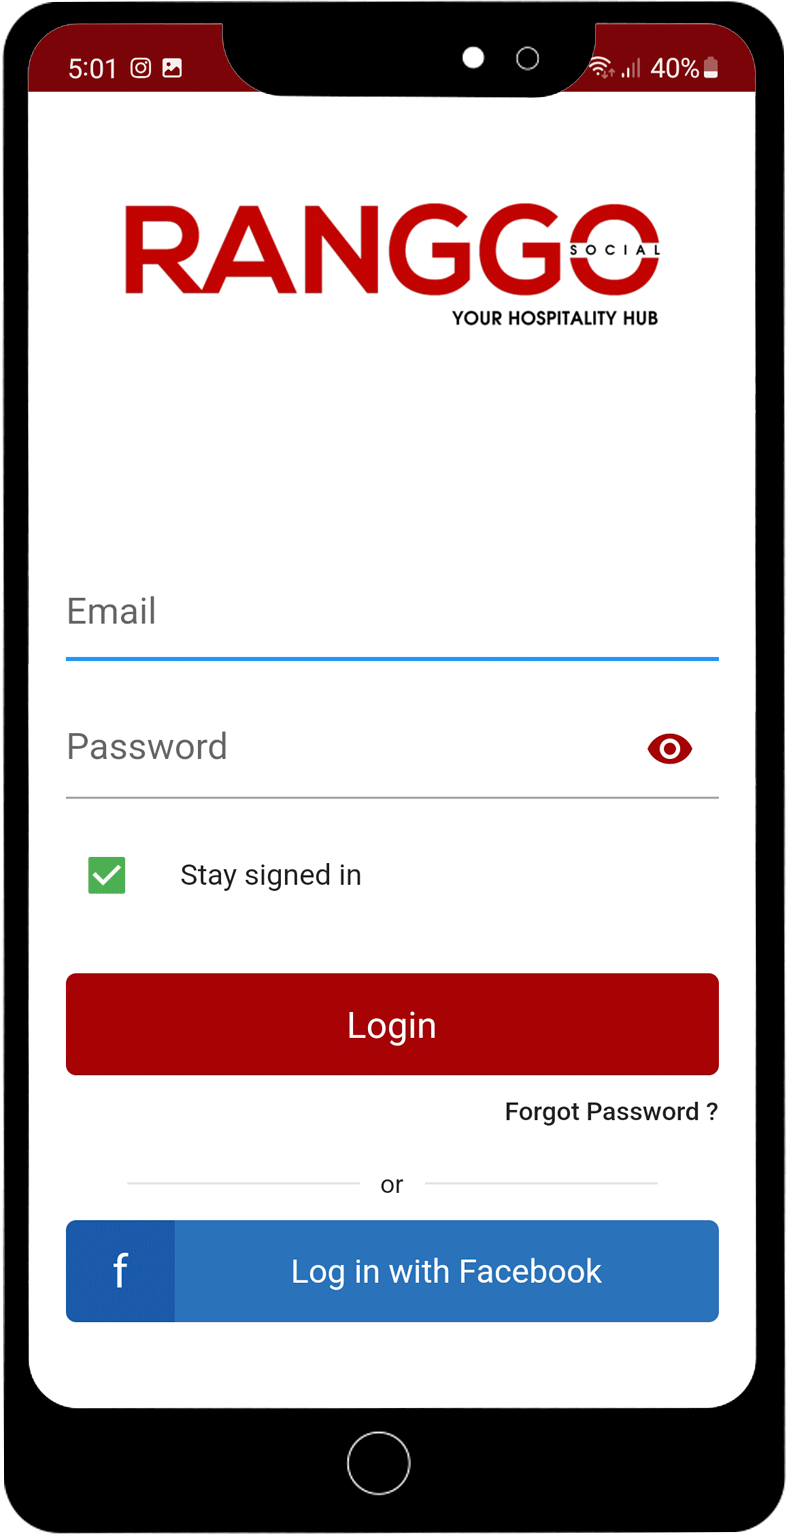
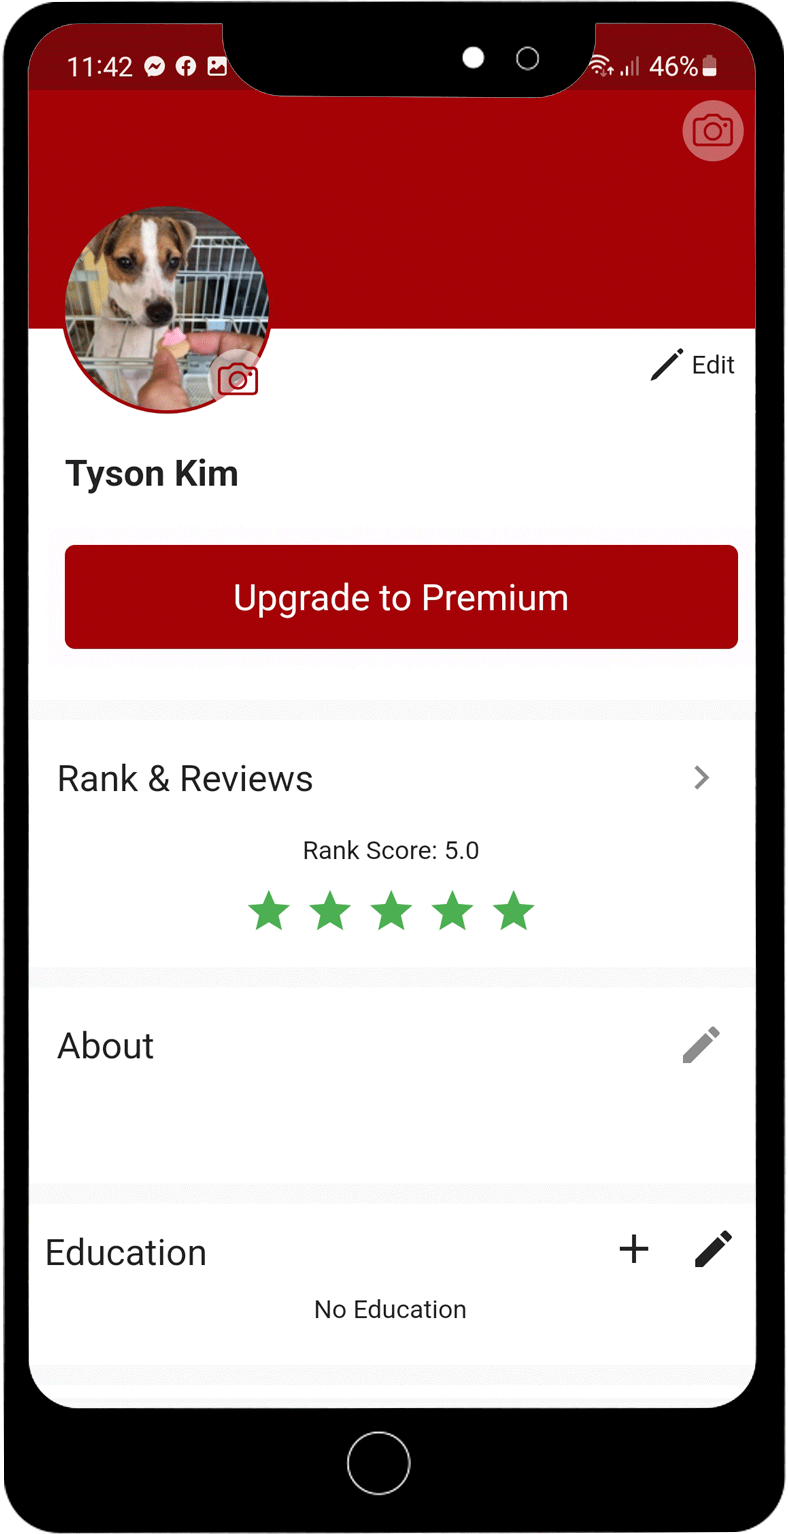
- Sign into the App.
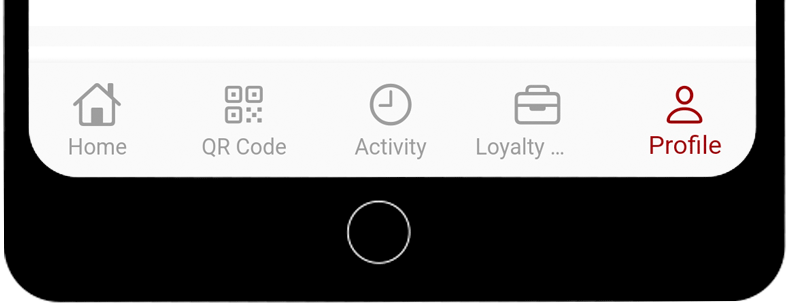
You should be taken straight to the Profile section to complete it. But if you aren’t you can select it from the row of icons on the bottom of your screen.
2. If you see an ‘Upgrade to Premium’ button click on this and action the next screen. This will give you greater access to all the features. It is still free.
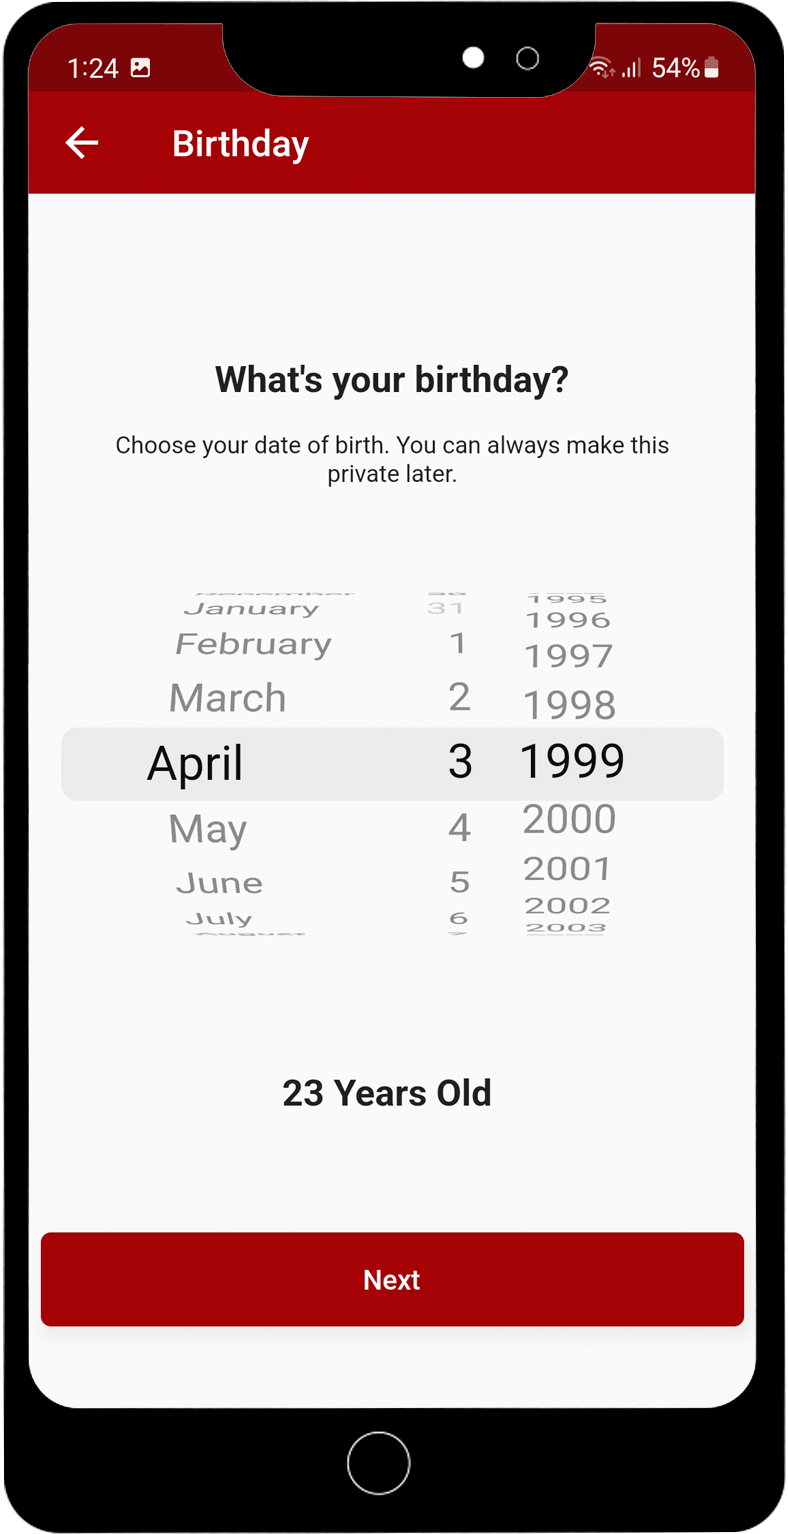
3. You can add your birthdate using the scrolling calendar feature
4. Next select your Gender.
It is important that you make sure you select the correct gender.
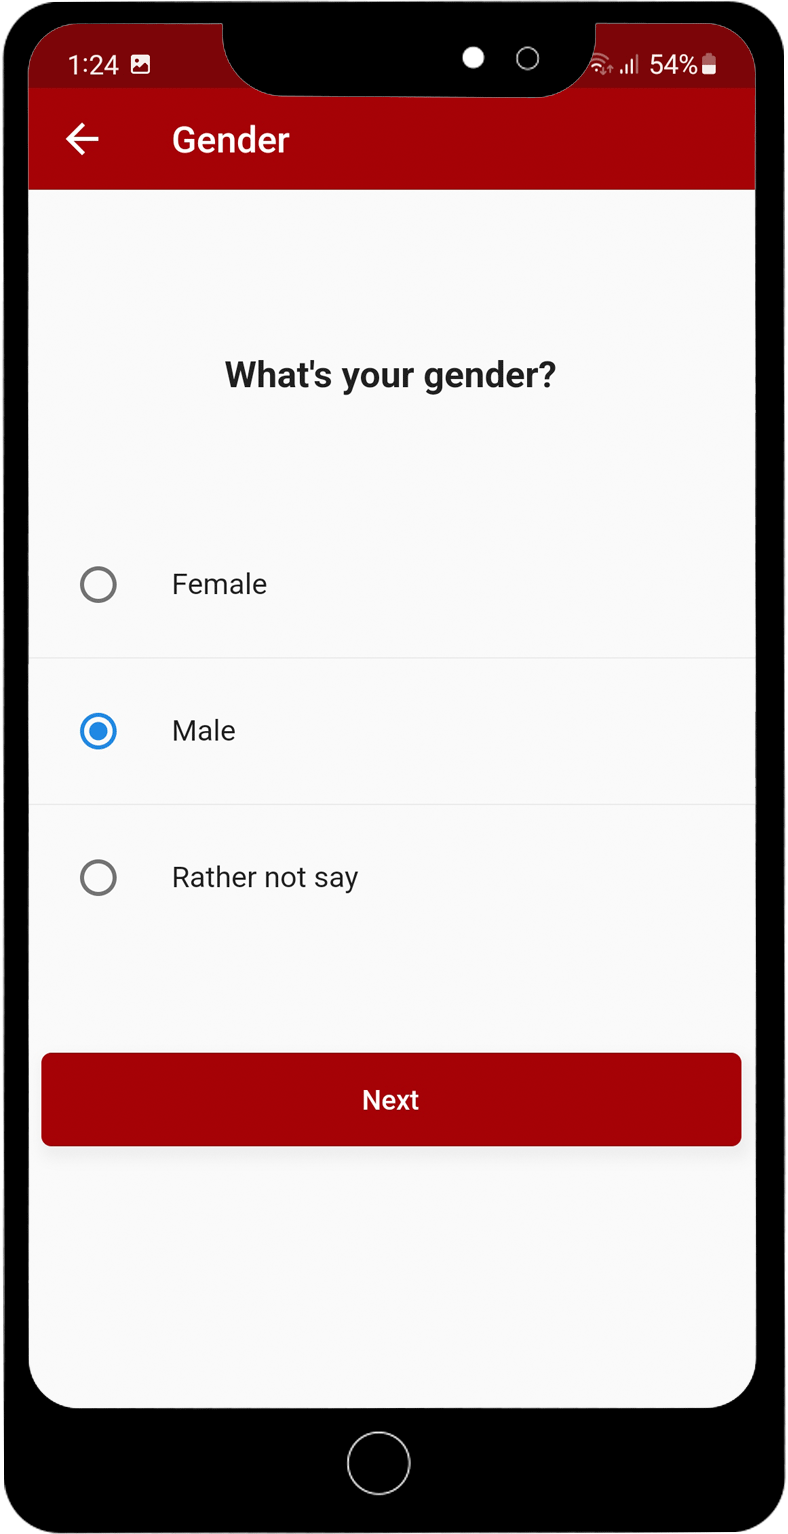
WHY? Because you can not change your gender later, if you selected the wrong option.
There is the option “Rather Not Say”. If you select that option that is what will appear on your profile. This can not be changed later either.
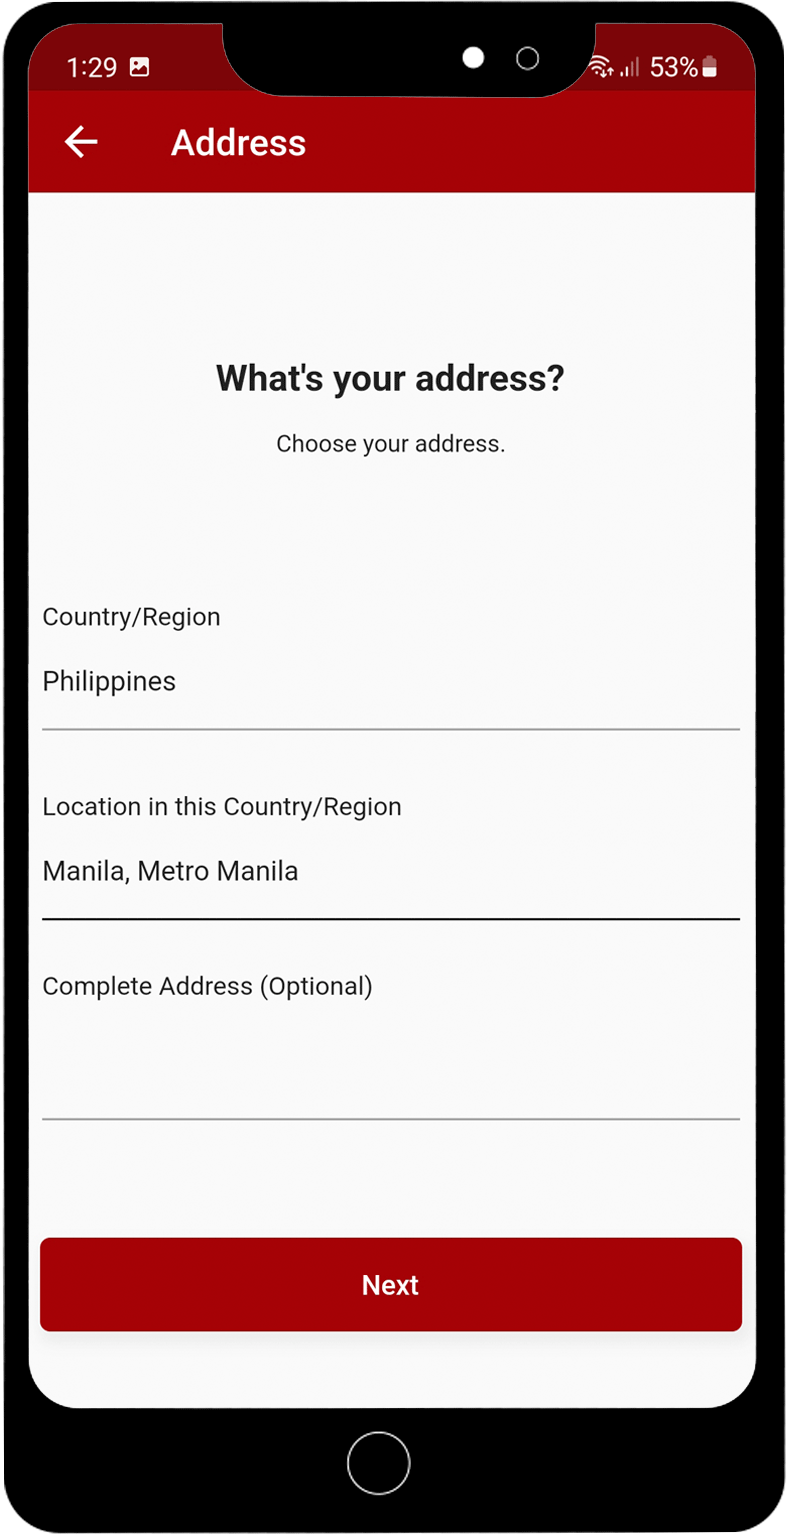
5. Next add your Address.
You can just add your country and your region. There is also the option to add your full address, if you want to.
6. You can add a Cover Image and a Profile Image.
Just click on the pencil icon and upload your photos – just like you do for Facebook and Instagram.
Remember: Your team mates, boss and customers will see your profile photos – so keep the images professional!
7. About Section:
This is a chance to explain a little bit about yourself. Think of this as your covering letter or the section of your resume where you give some information about yourself, your hobbies, and your attitude and aspirations. You have 300 characters only.
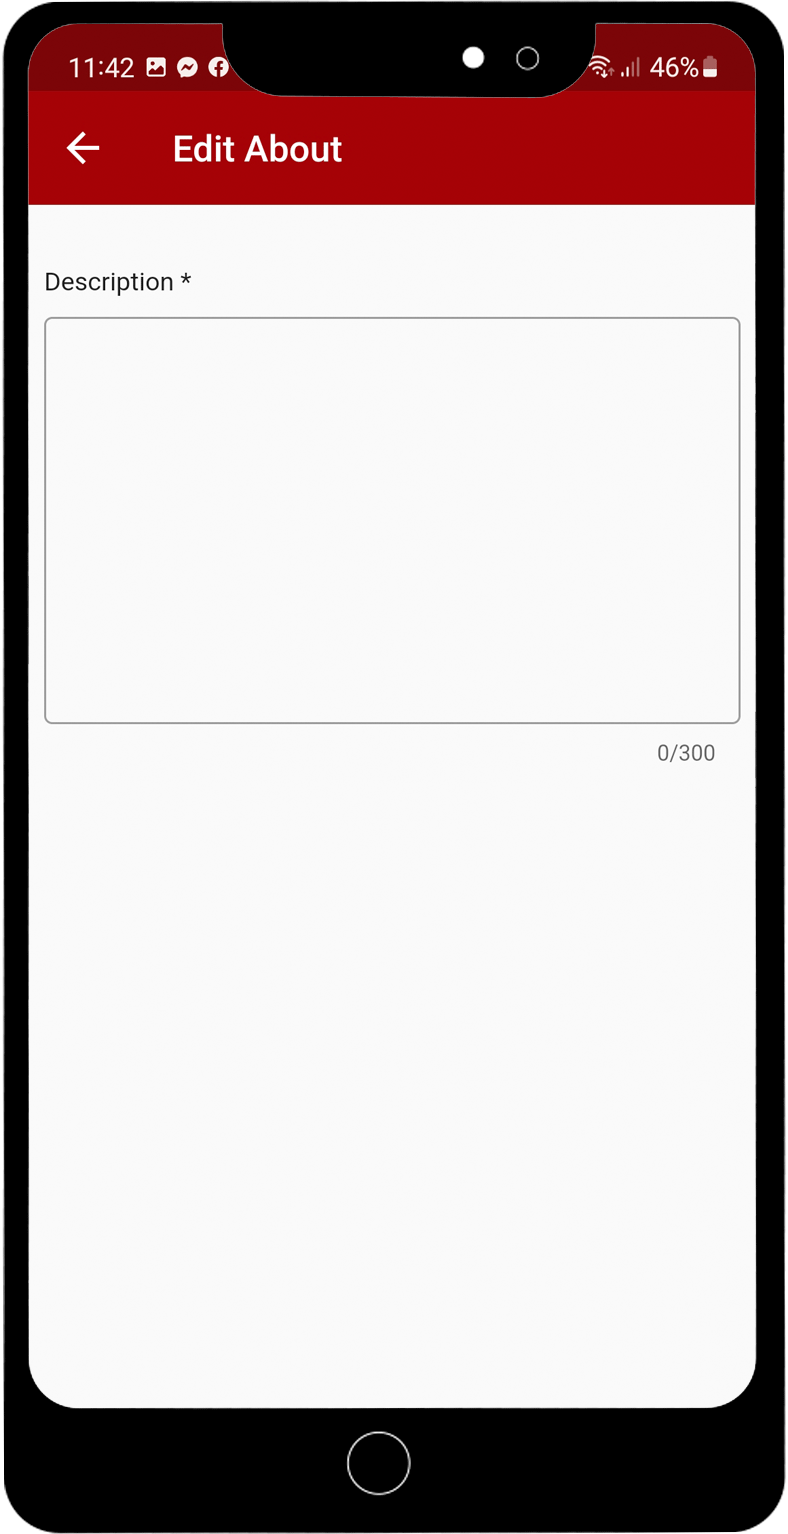
Remember that other subscribers, your employers and eventually customers will be able to see this section too. So keep it professional.
Remember to Save your updates.
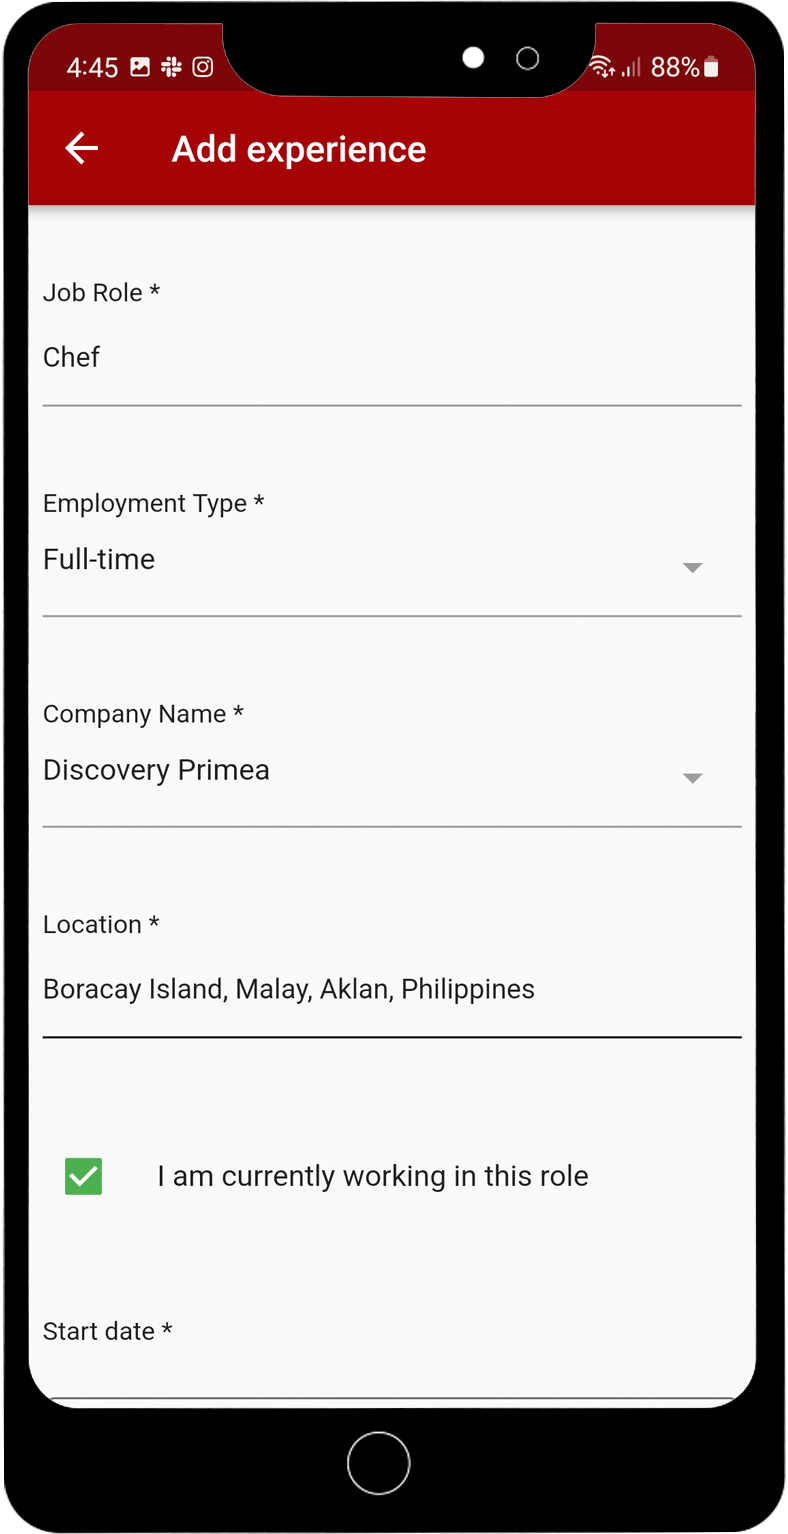
8. Complete the Experience Section:
The first box is the company you work for. If your employer is already a RANGGO Business Partner you will see their name in a drop-down menu. You can select it to link your profile to their Business Account as an employee. This is a bit like LinkedIn.
If the Company Name does not appear, just type in the name of the Hotel, Restaurant or business where you are currently employed.
Add your current job first. Add your job title under Job Role.
Next select your employment type.
Add your Start Date. Remember to tick the box that says you are currently working there.
Next type in the location, where you work.
You can add the rest of your employment history, job by job, including your job title and the Company Name too. You can do that later if you do not have time right now.
Why? Well, one brilliant feature of the RANGGO App is the ability to send your profile information to Businesses who are advertising jobs on the RANGGO App. Your profile becomes a digital resume, that you can send with just the click of a button!!!
Remember to Save your updates.
9. Complete the Education Section:
Start with your most recent University or College. You don’t need to go back as far as Grade/Middle school. If you need to edit anything click on the pencil icon.
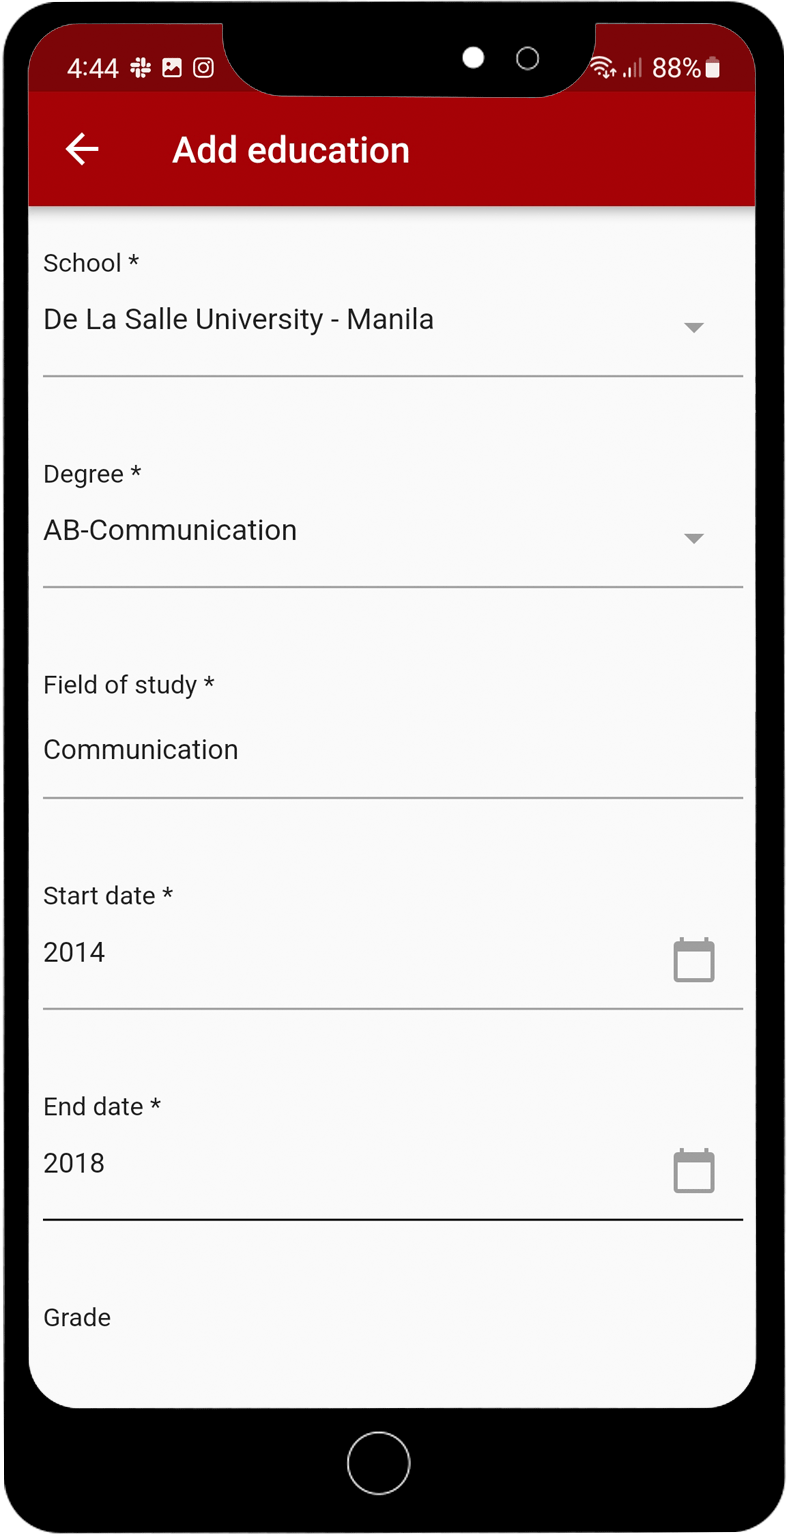
Remember to Save your updates.
Now you are ready to use the App!
Read more about all of the RANGGO App features

One Comment